 Subscribe to the RSS Feed
The staff of Soigné would like to wish Tête à Pied makeup artist, Soigné team member and “Classiest Broad in SL” Roslin Petion the very best on her birthday.

Happy Birthday Ros!
Posted by Caliah Lyon on November 26, 2007
The staff of Soigné would like to wish Tête à Pied makeup artist, Soigné team member and “Classiest Broad in SL” Roslin Petion the very best on her birthday.
Happy Birthday Ros!
Posted in News and Announcements | Tagged: Roslin Petion | 4 Comments »
Posted by Caliah Lyon on November 25, 2007
Please refer to Optimising Windlight for Avatars 2.0
as these settings are obsolete.
This is a simple method to optimise the First Look Windlight Viewer so the light doesn’t cast those dreaded harsh shadows on your avatar’s face. It also casts the landscape in a softer light, eliminating glare, and making it easier on your eyes. I’m sure there are better settings, but this is a straightforward no-frills solution for those of us who don’t want to fiddle too much with the controls. Your avatar will look good even without a facelamp (even if it’s a little dark), though this is best if you do wear one 🙂

Using this preset with my own facelamp (facing the sun/facing away from the sun).

Using this preset without a facelamp.

Default Windlight presets (Noon, Sunrise). Note the lines that “age” an avatar.
1) Open World > Environment Settings > Environment Editor.
2) Click on Advanced Sky.
3) Choose the Blizzard preset. Click on New, then save the preset under another name, e.g. “My Preset.”
4) Click on the Clouds tab. Set Cloud Coverage to something low, like 0-0.20.
5) Click on the Lighting tab. Under Ambient, raise I (intensity). I recommend using 0.35-045, with the lower values for those who use facelamps; raise higher if needed.
6) Look for the Sun Glow setting. Raise Size to 1.99 (the maximum).
7) Click on the Atmosphere tab. You need to look at the values for Haze Horizon and Haze Density (read on what they do by clicking on the “?” beside each).
8) Have your avatar face the direction of the sun, then fiddle with the settings. I set my Haze Horizon somewhere between 0.15-0.40 depending on how bright I want my horizon, and my Haze Density is 1.00-4.00 depending on how bright I want the day or how clear I want my surroundings. Look at your avatar’s face while adjusting the sliders so you can judge which setting works best for you. Remember to turn in all directions so you can see how it looks when you face away from the sun.
9) You can change the direction the sunlight is coming from by changing East Angle. The Blizzard default is 0.00; try experimenting with what setting you prefer. This is particularly useful for photography.
10) Save your preset, then make any other adjustments you may want to make. If the lighting is a little dark for your taste overall, try clicking on Lighting then raising either Ambient Intensity (I) or Scene Gamma a fraction.
I’m aware this isn’t perfect – it may cause the landscape to look a little dim, some of the lines on your face may not be ironed out, but this is a good all-around preset for when you’re just exploring or shopping and want to look your best with Windlight. Hope you find this useful!
1/13/2008: I’ve adjusted the values for Ambient (as per version 18.6.76116 which you may download here and useable only with a third-party client such as Nicholaz) and added a step for East Angle. I am supporting vers. 76116 in this tutorial because the current version, 18.6.76886, has local lighting with effects on avatars similar to the default viewer.
If you’d like to just download the preset, you may download it here. Unzip these to C:/Program Files/Secondlifewindlight/app_settings/windlight/skies, and rename it from AvatarOpt to whatever you like before starting up SL. When you look in your presets it should be there. Adjust the Ambient Intensity and East Angle value in the Lighting tab as needed. Enjoy!
Posted in Art and Photography, Guides | Tagged: windlight | 37 Comments »
Posted by Caliah Lyon on November 13, 2007
Grey may have been the choice staple this fall/winter, but for those who prefer richer colours and a more traditional autumnal palette the deep metallics – bronze, gold – as well as the usual red, sienna, and orange – are a sure way to add a touch of warmth. The silhouette is slim and spare in these five outfits, but the look is far from minimalist with fur, wool, brocade, muted prints, and crocodile.
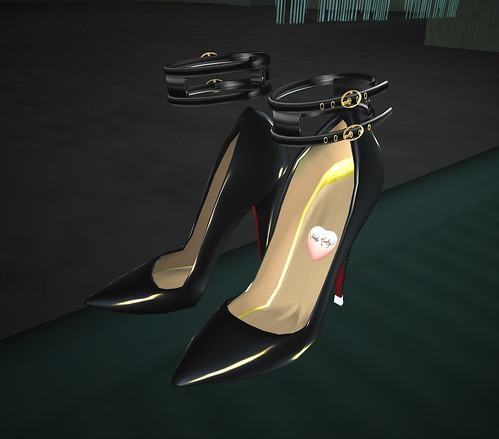
Designers have achieved near-perfection with many of the sculptie knee-high boots recently, and the choices here are must-haves.

Noir
The Nicole Suit from Nicky Ree is perhaps one of the most versatile of dressy alternatives to a gown; with Nicky’s usual array of skirt and pant options and a few choice changes of accessories one can have a myriad of variations on the basic suit. Wear with a delicate cocktail hat from Morrigan Hyun, some fur trim and the long centre skirt for a touch of Old Hollywood, or a high-collared undershirt and Siyu Suen’s Sun Hat tinted dark grey (free at her store) for a costume with a hint of the Edwardian, sans corset.
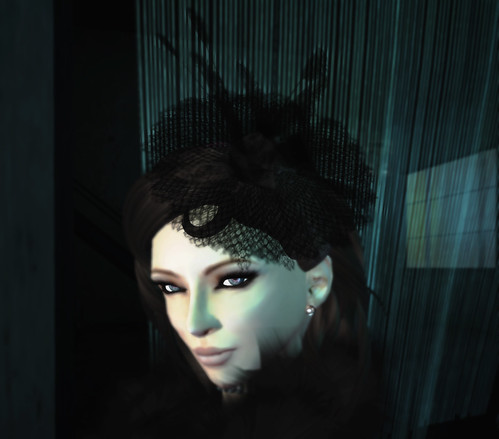
Nicole Suit in Black, Nicky Ree, L$800; Fur Collar in Grey from the Duchess Coat, Casa Del Shai, L$750; Fur Cuffs (tinted dark grey) from the Anneline Brown Jacket by Ivalde, Calla Anniversary gift; Leather Gloves in Black, Tete a Pied, L$100; Valena Hat in Black, Elegance Hats, L$175; Alyssa Diamond Bitchstick, Foxy’s Smoke Shop, L$290, Claris Black Pearl Choker and Earrings, RFL Limited Edition, Muse; Ten-Colour Ankle-Strap Pump, Stiletto Moody, L$2750. Hair: Christina from ETD.

Autumn
The Virginie Breeches and Liah Boots in Chocolate both have a rich bronze gleam; matched with a leopard-patterned silk blouse, leather gloves and the Tilo leather posture collar/scarf, this may be orange overkill, but the combination of textures in the same palette made this outfit too fun to resist.
Secretary Blouse in Brown, Casa del Shai (pack), L$400; Gunmetal Breeches from the Virginie Riding Suit, Last Call, L$450; The Marquise Corset in Chocolate (undershirt layer), Casa del Shai, L$450; Posture Collar from the Tilo outfit, Last Call, L$400; Short Leather Gloves in Tan, Tete a Pied, L$100; Tri-Colour Ethnic Wood Bangle, Earthtones, L$129; Classic Tank Watch in Natural/Gold, Muse, $200; Liah Boots in Chocolate, Last Call: Vamp, L$250; Hair: Gwen from ETD.
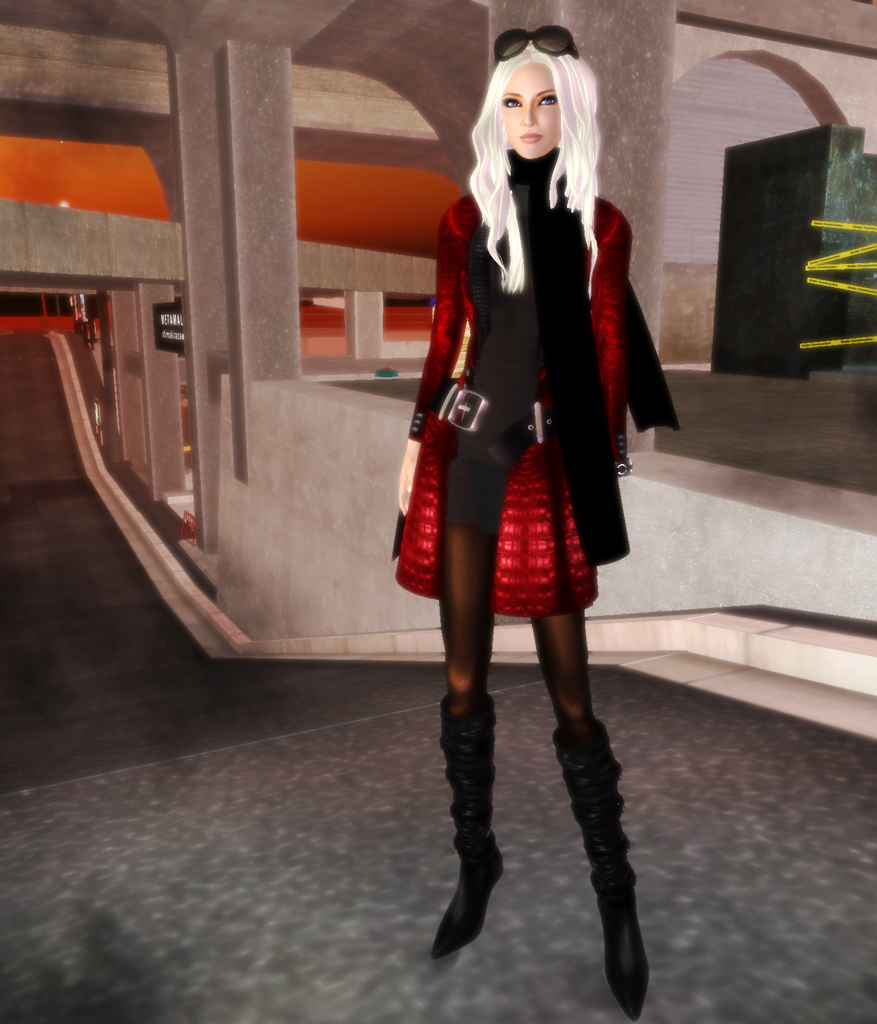
Crimson
High-quality open coats for women are still a rarity despite the recent windfall of coats, and as such the fact that this striking metallic red crocodile trench was made for men shouldn’t discourage one from wearing it. Tone down the effect with a a black sweater dress, a scarf rather than the fur collar, and play up the manga-esque element with some metallic leggings, dyed hair and a slick pair of boots.
Le Smoking Croc Trench Coat in Red, Casa del Shai, L$700; Rainy Day Dress in White (tinted dark grey), Armidi Gisaci, L$235; Metallic Leggings in Bronze, Armidi Limited, L$95; Electric Bugaloo Patterns Scarf, Gritty Kitty (Block Party Limited Edition); Fear and Loathing Watch, Wilted Rose, L$120; Kyoto Boots in Black/Black, L$375, and Fi Umo Sunglasses in Black Tortoise/Black Lens, L$225, Armidi Gisaci. Hair: Pasadena Girl III (full flex) from Armidi.
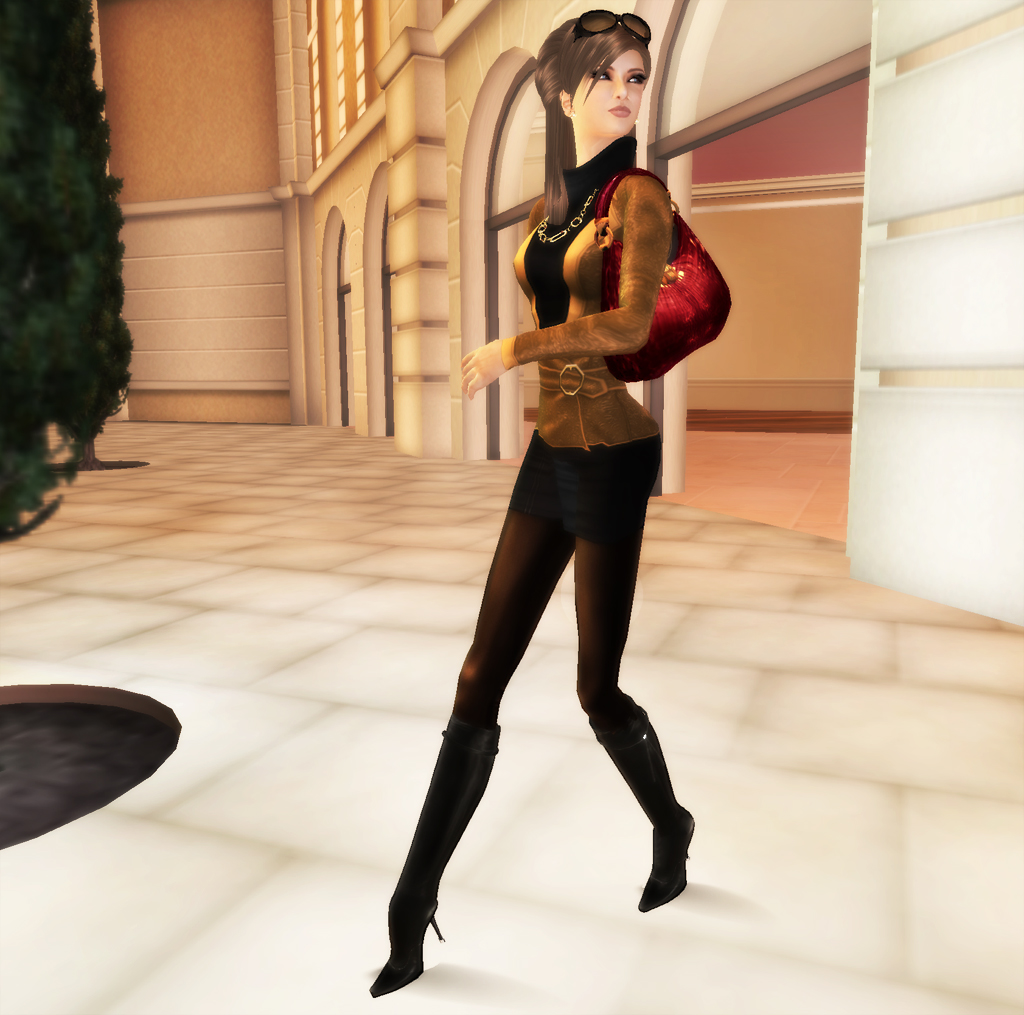
Gold
The same fitted dress from Armidi can be paired with this golden brocade blazer for a different and very versatile, sophisticated look; change the bronze leggings and sleek boots to hose and a pair of pumps, and you can go from dressy casual to all business in a matter of seconds. Add chunky gold jewelry and a vibrantly coloured crocodile bag.
Jennifer Brocade Belted Blazer, Last Call, L$200; Rainy Day Dress in Black, Armidi Gisaci, L$235; Metallic Leggings in Bronze, Armidi Limited, L$95; Sculptie Boots in Black, Redgrave, L$450; Freja Shoulder Bag in Pink, Bare Rose, L$140; Fi Umo Sunglasses in Black Tortoise/Gold Lens, L$225, Armidi Gisaci; Gold Necklace from Muse (as yet unreleased); Triste Rosette Earrings in Gold, Muse, L$300. Hair: Phoebe from ETD.

Bronze
Comfortable enough for drinks at the pub but dressy enough for an evening out, this look hinges on the richly textured sweater with a trompe l’oeil rose and string of pearls. Complete with prim cuffs and collar and a plain option, they’re available in a variety of colours and a steal at 10L.
Cuddly Sweater in Red with Rose, Simone at Fashion Avenue, L$10; Skirt from the Nouvelle Librarian in Corn and Brown, Casa del Shai, L$250; Red hose from the 13-colour hose pack, Blaze, L$100; Sculptie Boots in Smoke from Redgrave, L$450; Freja Square Handbag in Brown, Bare Rose, L$140; Freshwater Pearl Necklace, Muse CSI:NY free gift, and Claris Pearl Earrings in Gold, L$50. Hair: Phoebe from ETD.
Have a good week 🙂
Posted in Accessories, Casual Chic, Formal & Ball, Jewelry, Shoes | Tagged: armidi, bare rose, blaze, casa del shai, earthtones, elegance hats, foxy's, ivalde, last call, muse, nicky ree, redgrave, stiletto moody, wilted rose | 22 Comments »
